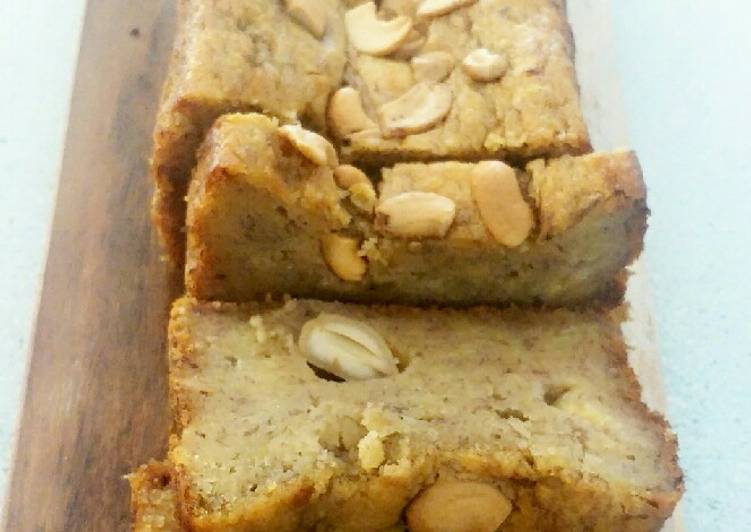
Recipe of Quick Moist Banana Cashew Bread (Roti pisang kacang mete)
Moist Banana Cashew Bread (Roti pisang kacang mete). Whisk the flour, baking soda, salt, together in a large bowl. Using a handheld or whisk, mix the oil or butter (i am using oil) and brown sugar together. Mix in the vanilla and bananas.
 Combine the oil, eggs, sugar, milk, vanilla, and mashed bananas. Add the baking soda and flour. In a large bowl, combine first six ingredients.
Hey everyone, it's Jim, welcome to our recipe page. Today, I'm gonna show you how to make a distinctive dish, moist banana cashew bread (roti pisang kacang mete). One of my favorites food recipes. For mine, I will make it a little bit unique. This is gonna smell and look delicious.
Moist Banana Cashew Bread (Roti pisang kacang mete) is one of the most well liked of current trending foods on earth. It's appreciated by millions every day. It's easy, it is quick, it tastes yummy. They're nice and they look wonderful. Moist Banana Cashew Bread (Roti pisang kacang mete) is something which I've loved my entire life.
Whisk the flour, baking soda, salt, together in a large bowl. Using a handheld or whisk, mix the oil or butter (i am using oil) and brown sugar together. Mix in the vanilla and bananas.
To get started with this recipe, we have to first prepare a few ingredients. You can have moist banana cashew bread (roti pisang kacang mete) using 19 ingredients and 8 steps. Here is how you cook that.
The ingredients needed to make Moist Banana Cashew Bread (Roti pisang kacang mete):
- {Make ready 11/2 half of cup self raising flour.
- {Make ready 1/2 tsp of baking soda.
- {Make ready 3/4 of .cup brown sugar.
- {Make ready 1/4 cup of yogurt.
- {Prepare 2 of eggs-room temperature.
- {Make ready 1/2 cup of grape seed oil or butter room temperature.
- {Get 1 pinch of salt.
- {Make ready 1 tsp of lemon juice.
- {Make ready 3 of large ripe bananas, mashed.
- {Get of INGREDIENTS IN INDONESIAN:.
- {Take 11/2 cup of tepung cakra.
- {Prepare 1/2 of sdt soda kue.
- {Get 3/4 cup of gula.
- {Take 1/4 cup of yogurt(bs di lewati).
- {Get 2 of telur, suhu ruangan.
- {Take 1/2 cup of minyak sayur atau mentega blueband di cairkan.
- {Take 1 of sdt garam.
- {Take 1 of sdt juice lemon atau ganti vanila bubuk.
- {Make ready 3 of buah pisang.
In a large bowl, whisk eggs, bananas, oil and vanilla. Stir into dry ingredients just until moistened. Mari belajar masak bareng LH Kitchen!! Semoga bermanfaat dan membantu buat teman-teman yang mau belajar masak.
Steps to make Moist Banana Cashew Bread (Roti pisang kacang mete):
- Adjust the oven rack to the lower third position and preheat the oven to 175 C. Grease a 9×5-inch loaf pan or coat with nonstick spray. Set aside..
- Whisk the flour, baking soda, salt, together in a large bowl..
- Using a handheld or whisk, mix the oil or butter (i am using oil) and brown sugar together until smooth and add the eggs one at a time, whisking well. Add the yogurt, mashed bananas, and lemon juice or vanilla extract until combined. Add the dry ingredients into the wet ingredients until well combine. Do not overmix. Fold in the nuts(option).
- Spoon the batter into the prepared baking pan and bake for 60-65 minutes. Loosely cover the bread with aluminum foil after 30 minutes to help prevent the top and sides from getting too brown. A toothpick inserted in the center of the loaf will come out clean when the bread is done. Remove from the oven and allow the bread to cool completely in the pan set on a wire rack..
- Setel oven di rak nomer 3 paling bawah, temperature 175 C.olesi atau spray cetakan dengan minyak..
- Campur tepung cakra, garam dan baking kue, aduk rata. Sisihkan.
- Gunakan mixer tangan, atau manual, kocok mentega atau minyak sayur dan gula sampe rata, Tambahkan telur, yogurt(bisa di lewat), pisang, vanila bubuk atau air perasan lemon. Aduk sampai tercampur rata. Masukkan adonan kering ke adonan basah, aduk rata jangan trlalu berlebihan saat mengaduk. Tambahkan kacang jika memakai.
- Tuang adonan ke cetakan,panggang selama 60-65 menit, tutup bagian atas dengan kertas aluminium setelah panggang 30 menit, untuk menghindari gosong bagian atas. Cek kematangan dengan menusukkan tusukan bambu, apabila bagian tengah kering maka proses pemanggangan selesai. Keluarkan roti pisang dari oven dan diamkan sampe dingin di rak. Selamat menikmati.
In a large bowl, stir together the melted butter and sugar. Add the eggs and vanilla, mix well. Combine the flour, baking soda and salt, stir into the butter mixture until smooth. Finally, fold in the sour cream, walnuts and bananas. Ok so a few years ago I posted an old-fashioned banana bread recipe that is great!!
So that's going to wrap it up with this special food moist banana cashew bread (roti pisang kacang mete) recipe. Thanks so much for reading. I'm sure you will make this at home. There's gonna be interesting food at home recipes coming up. Don't forget to save this page in your browser, and share it to your loved ones, colleague and friends. Thank you for reading. Go on get cooking!
Step-by-Step Guide to Prepare Popular Gyudon (beef and rice bowl) With Easy Cooking Guide
Gyudon (beef and rice bowl) this is the well liked recipe ever, So simple to prepare and maybe this recipe is the ingredient you will ever need. Everyone needs a good recipe and I can't be the only person forever seeing food on my ripe table. Finally I learned to make this recipe, and I will share the secret recipe here with easy, flexible, and yummy!
Hey everyone, it is Jim, welcome to my recipe site. Today, I'm gonna show you how to make a special dish, gyudon (beef and rice bowl). It is one of my favorites. This time, I am going to make it a bit unique. This is gonna smell and look delicious.
Gyudon (beef and rice bowl) is one of the most favored of current trending meals on earth. It's simple, it's fast, it tastes yummy. It is enjoyed by millions daily. They're fine and they look fantastic. Gyudon (beef and rice bowl) is something which I have loved my entire life.
To begin with this recipe, we have to first prepare a few components. You can have gyudon (beef and rice bowl) using 16 ingredients and 7 steps. Here is how you cook that.
Recipecuisine : American
Prepare Time: 8 mins
Cook Time: 25 mins
Yield: 5 servings
Nutrition Facts: Per serving 210 calories
The ingredients needed to make Gyudon (beef and rice bowl):
- Prepare 200 g of rib eye beef, very thinly sliced or pre sliced beef meat from butchers.
- Prepare of Gyudon sauce:.
- Make ready 2 tablespoons of vegetable oil (or any cooking oil).
- Prepare 1 of small brown onion, finely skiced.
- Prepare 1/2 teaspoon of fresh or minced garlic.
- Take 1/2 teaspoon of fresh or minced ginger.
- Take 8 tablespoons of water.
- Take 4 tablespoons of soba noodle sauce or 1/4 teaspoon dashi powder.
- Prepare 4 tablespoons of light soy sauce.
- Prepare 4 tablespoons of mirin.
- Make ready 1-2 tablespoons of white sugar (caster or granulated).
- Take of Garnish:.
- Take 1/2 of spring onions, finely sliced.
- Take of Sprinkles of Shichimi (Japanese 7-spice).
- Take 1 of egg yolk (optional).
- Take of Sprinkle black sesame seeds (optional).
Instructions to make Gyudon (beef and rice bowl):
- Thinly slice the rib eye, transfer onto a plate and set aside..
- In a large saucepan add on medium high heat, add the cooking oil and then add the sliced onions..
- Sautee onions until soft, then add the thinly sliced beef along with the ginger and garlic paste. Cook the meat until it is no longer pink..
- Then to the onions and meat add water, soba noodle sauce or dashi powder, light soya sauce, mirin and sugar. Stir continuously until sugar has dissolved. Reduce heat to medium low and cover with a lid. Let the broth cook and reduce for about 7-10 minutes. Taste and amend if necessary (add more soya sauce, sugar, water etc)..
- Once the meat has cooked and the sauce has reduced. Turn heat off and remove saucepan from the heat..
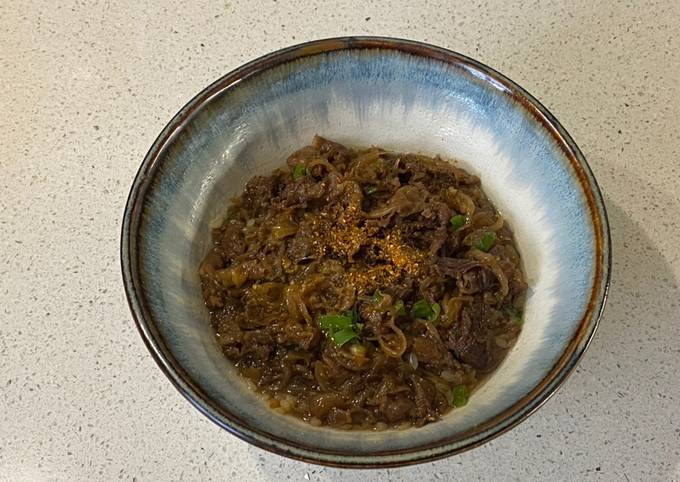
- To serve place steamed rice in each bowl at the bottom, then using chopsticks is tongs place beef and onions over the rice. Add the egg yolk (optional) and garnish with spring onions, shichimi and sesame seeds (optional)..
- Spoon over as much it little of the broth and pour it over the meat, onions and rice..
So that's going to wrap this up with this special food gyudon (beef and rice bowl) recipe. Thanks so much for reading. I am confident you can make this at home. There is gonna be more interesting food in home recipes coming up. Remember to bookmark this page on your browser, and share it to your family, colleague and friends. Thank you for reading. Go on get cooking!
Gyudon (beef and rice bowl) Recipe Video:
Easiest Way to Make Original Chicken Salad with Miso and Sesame sauce With Simple Cooking Guide
Chicken Salad with Miso and Sesame sauce this is the popular recipe ever, So easy to make and maybe this recipe is the ingredient you will ever need. Everyone needs a good recipe and I can't be the only person forever seeing food on my ripe table. Finally I learned to make this recipe, and I will share the secret recipe here with easy, flexible, and very delicious!
Hello everybody, hope you are having an amazing day today. Today, I will show you a way to prepare a distinctive dish, chicken salad with miso and sesame sauce. It is one of my favorites food recipes. This time, I am going to make it a little bit unique. This will be really delicious.
Chicken Salad with Miso and Sesame sauce is one of the most popular of current trending meals in the world. It is easy, it is quick, it tastes delicious. It's enjoyed by millions every day. Chicken Salad with Miso and Sesame sauce is something which I have loved my entire life. They are fine and they look fantastic.
To begin with this particular recipe, we have to prepare a few ingredients. You can have chicken salad with miso and sesame sauce using 11 ingredients and 4 steps. Here is how you can achieve that.
Recipecuisine : American
Prepare Time: 8 mins
Cook Time: 15 mins
Yield: 1 servings
Nutrition Facts: Per serving 253 calories
The ingredients needed to make Chicken Salad with Miso and Sesame sauce:
- Prepare 1 of chicken breast.
- Take 1 of cucumber.
- Get 20 cm of spring onion.
- Get of Miso sesame sauce.
- Take 1.5 tablespoon of Miso.
- Make ready 1 tablespoon of sugar.
- Get 1 tablespoon of soy sauce.
- Make ready 1 tablespoon of sesame paste or tehina.
- Take 1 tablespoon of sesame seed.
- Prepare 1 tablespoon of water.
- Make ready 1/2 teaspoon of grind garlic.
Instructions to make Chicken Salad with Miso and Sesame sauce:
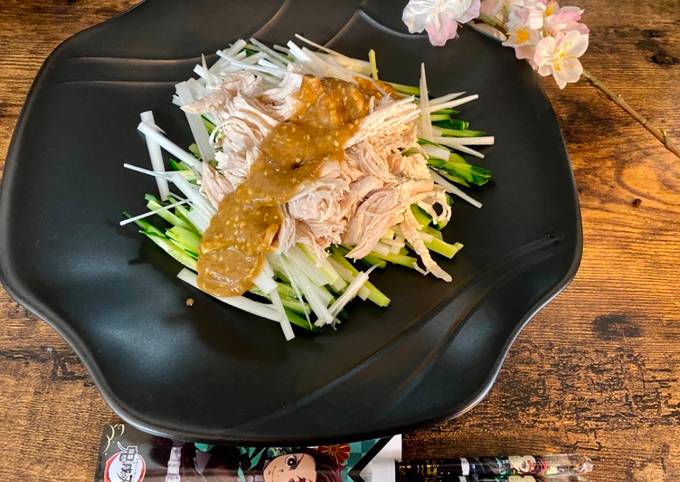
- Boil chicken breast with green onion and ginger..
- Make chicken small by hand. And shred cucumber and spring onion. Mix sauce ingredients..
- Enjoy 🌸.
- Today’s dinner. I made egg porridge with chicken stock and cooked rice..
So that's going to wrap it up for this exceptional food chicken salad with miso and sesame sauce recipe. Thanks so much for your time. I'm sure you will make this at home. There's gonna be more interesting food at home recipes coming up. Don't forget to save this page in your browser, and share it to your family, colleague and friends. Thanks again for reading. Go on get cooking!
Chicken Salad with Miso and Sesame sauce Recipe Video:
Recipe of Homemade Kooky Katsu 👀 With Easy Cooking Guide
Kooky Katsu 👀 this is the popular recipe ever, So simple to make and maybe this recipe is the ingredient you will ever need. Everyone needs a good recipe and I can't be the only person forever seeing food on my ripe table. Finally I learned to cook this recipe, and I will share the secret recipe here with easy, flexible, and very delicious!
Hello everybody, hope you are having an amazing day today. Today, I'm gonna show you how to make a distinctive dish, kooky katsu 👀. It is one of my favorites. For mine, I am going to make it a little bit unique. This is gonna smell and look delicious.
Kooky Katsu 👀 is one of the most popular of recent trending meals on earth. It's simple, it's fast, it tastes yummy. It is enjoyed by millions daily. They're fine and they look wonderful. Kooky Katsu 👀 is something which I've loved my whole life.
To begin with this recipe, we have to prepare a few ingredients. You can have kooky katsu 👀 using 17 ingredients and 14 steps. Here is how you can achieve that.
Recipecuisine : American
Prepare Time: 5 mins
Cook Time: 30 mins
Yield: 5 servings
Nutrition Facts: Per serving 254 calories
The ingredients needed to make Kooky Katsu 👀:
- Prepare 1 of and a quarter cups of basmati rice.
- Take of Curry sauce.
- Get 1 tbsp of vegetable oil.
- Get 1 of onion.
- Take 1-2 of carrots (depending on size).
- Take 2 tsp of medium curry powder.
- Make ready 300 ml of stock made with chicken stock cube.
- Prepare 1 of (small) tin of mushy peas.
- Take 2 tbsp of yakisoba sauce (I use Otafuku brand).
- Get of Chicken.
- Prepare 2 of chicken breast fillets.
- Take 2 tbsp of cornflour.
- Take 2 tbsp of chilli powder.
- Make ready of Salt and ground pepper.
- Prepare 2 of medium eggs.
- Prepare 2 cups of corn flakes.
- Take 2 tbsp of vegetable oil.
Instructions to make Kooky Katsu 👀:
- Get the rice on to cook. Rinse it under the tap in a sieve, then place in a saucepan with enough water to reach the first knuckle of your finger when you put it in the pan. Add salt. Bring to the boil..
- Cook rice on low heat for 10 minutes, or until water has disappeared. Take of lid, cover with clean tea towel, put lid back on and remove from the heat..
- Peel and slice the onion and carrot and heat the oil in a deep pan..
- Fry the onion and carrot until softened and lightly browned., then stir in the curry powder and cook off for 1-2 minutes..
- Add the chicken stock and the mushy peas and bring up to the boil. Place on a lower flame to simmer..
- Meanwhile, prepare three dishes... One with the cornflour, chilli powder, salt and pepper; one with the eggs, beaten and one with the corn flakes (which you need to crush in a food bag using a rolling pin to resemble breadcrumbs).
- Next, butterfly each of the chicken fillets and cut in half down the middle to make four pieces..
- Heat the 2 tbsp of oil in a skillet or heavy frying pan..
- Dredge the fillets in first the corn flour, then egg then corn flakes (I wear latex gloves for this bit).
- Fry the coated fillets for 4-5 minutes each side. While the are cooking, use a stick blender to blitz the curry sauce until smooth..
- Stir the Yakisoba sauce in the curry sauce..
- Drain the chicken on kitchen paper and dab off excess oil..
- Uncover the rice and fluff it up with a fork..
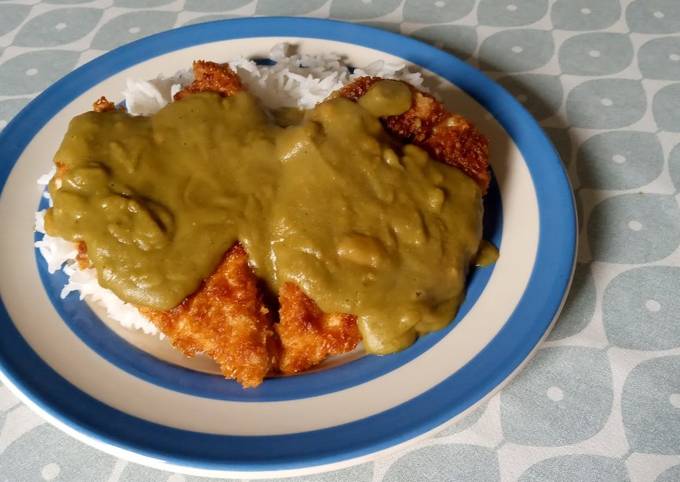
- Serve the rice with the chicken on top, covered with a generous amount of curry sauce..
So that is going to wrap this up with this exceptional food kooky katsu 👀 recipe. Thank you very much for reading. I am sure that you can make this at home. There is gonna be more interesting food at home recipes coming up. Don't forget to bookmark this page on your browser, and share it to your loved ones, colleague and friends. Thanks again for reading. Go on get cooking!
Kooky Katsu 👀 Recipe Video:
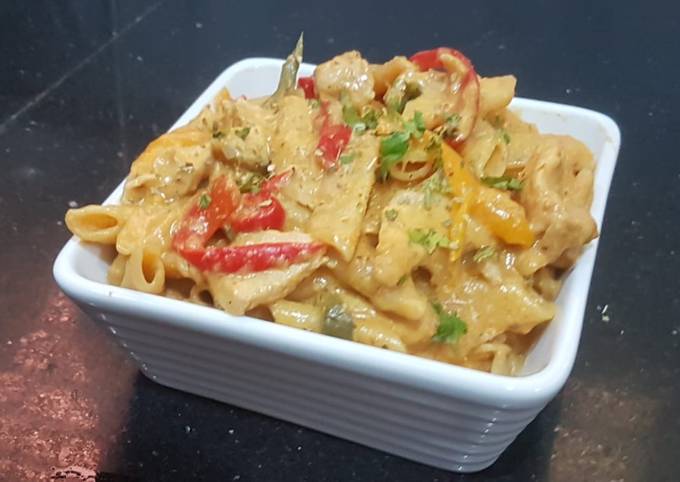
Recipe of Homemade One pot fajita pasta With Simple Cooking Guide
One pot fajita pasta this is the well liked recipe ever, So simple to make and maybe this recipe is the ingredient you will ever need. Everyone needs a good recipe and Finally I learned to cook this recipe, and I will share the secret recipe here with easy, flexible, and yummy!
Hey everyone, it is me again, Dan, welcome to our recipe page. Today, I'm gonna show you how to make a special dish, one pot fajita pasta. One of my favorites food recipes. This time, I will make it a little bit tasty. This is gonna smell and look delicious.
One pot fajita pasta is one of the most well liked of current trending meals on earth. It's simple, it's fast, it tastes delicious. It is appreciated by millions daily. They're nice and they look fantastic. One pot fajita pasta is something that I've loved my entire life.
To begin with this particular recipe, we have to prepare a few ingredients. You can have one pot fajita pasta using 17 ingredients and 9 steps. Here is how you can achieve it.
Recipecuisine : American
Prepare Time: 10 mins
Cook Time: 20 mins
Yield: 5 servings
Nutrition Facts: Per serving 259 calories
The ingredients needed to make One pot fajita pasta:
- Make ready 400 gm of boneless chicken cut in small strips.
- Get 5 of tabsp oil.
- Get 3 clove of garlic finely chopped.
- Prepare 1 of yellow capsicum.
- Make ready 1 of red capsicum.
- Get 1 of green capsicum.
- Prepare 1 of large onion chopped.
- Get 4 cup of penne pasta.
- Make ready 5 cup of milk.
- Prepare 1 tsp of salt.
- Prepare 1 of tabsp red chilli powder.
- Make ready 1 tsp of pepperika powder.
- Take 1 tsp of cumin powder.
- Prepare 1/2 cup of mozzerella cheese.
- Take 1/2 cup of chadder cheese.
- Prepare 2-3 pinch of origano.
- Take of fresh or dry parsley (optional).
Instructions to make One pot fajita pasta:
- In a pan add oil add 3 cloves of garlic finely chopped soute for 30 seconds add chicken cook for 6 minutes until changes colour remove from pan.
- Now add three colour capsicum and onion soute for 30 second on high heat.
- Add chicken mix,add salt red chilli powder peprika powder and cumin powder.cook for 1 minute.
- Now add milk (5cup).
- Add penne pasta.
- Mix and cover.cook for 15 minutes on medium heat.
- When tender add chadder and mozerrella cheese.cook for 1 more minute..
- It's ready to serve.
- Sprinkle some origano and garnsh with fresh or dried parsley..
So that is going to wrap this up with this exceptional food one pot fajita pasta recipe. Thank you very much for your time. I am confident you will make this at home. There's gonna be interesting food at home recipes coming up. Don't forget to save this page in your browser, and share it to your family, colleague and friends. Thank you for reading. Go on get cooking!
One pot fajita pasta Recipe Video:
